Saturday, January 26, 2013

Saturday's Sketch Share!

Hello!  I am back with the week's share.  It was one of the week's that we had a choice between circle and square.  We both went with the square choice, but we did different sizes of square cards.  I am telling you this because they look to be the same size in the pics below.  You see I forgot to take a picture of mine before I sent in the mail to Debbie and so she took a picture for me and sent it to my email.  The coloring is great, but the size shows bigger than the actual card was.  My card was actually about a 4 1/4 x 4 1/4 inch square.  And Debbie's is a 5 x 5 inch square.  Well, I guess I had better get to showing you our cards ... enjoy!
 
 
My Card

Debbie's Card

The Sketches
Oh my goodness, is Debbie's card not hilarious?  It made me giggle when I saw it!  And how about the coloring on my birds?  Not sure I have seen those bird colors, but I was trying to match the paper!  Only with copics could I do such crazy blending!  What do you think of the cards this week?  Fun?

Today is the second stamp convention of the month. I can't resist going, as I had so much fun seeing people at the one a couple of weeks ago that I hadn't seen in quite some time.  However, the last one is when I see the most people I know, as it was the closest one to the store I had.  But, there will be many old faces at this one too, I hope.  And, I will probably pick up a few new goodies too!

Next week is my teaching week, but I hope to at least finish the "houses" (see last post) before I have to start my class kit making.  If I get them done, I'll do a post to show you them.


Happy Stamping!
Tina

Thursday, January 24, 2013

Home Sweet Home!

Hello!  One of the things I bought at the stamp convention was a die set of a house.  For those of you who are familiar with the Memory Box window dies, this is a smaller version, but it comes with all the dies to make a house.  Go here to see the set.  A couple of years ago, I did a booth at a craft fair in downtown Mabank, and my realtor bought a few cards from me that day.  And she implied that if I would make her some more, she might buy them from me.  Well, that has been in the back of my mind. And since then, I have bought several house stamps, but never really thought the cards were that special to try to see if she would be interested.  But, when I saw this set of dies ... I knew I could make something special!  And I think I have.  In fact, I sent her the pics you are seeing today, and she wants me to make 6 cards for her to start!  Woo Hoo!  She wants them in different colors.  So, I originally thought I would wait until I got all of them finished to do this post.  But, decided I would show you the first one today and then show you the additional ones when I get them done!  It is a center step card, but I made it smaller so that it would fit in a regular A-2 envelope.  Here is my little house card ... enjoy!
 
 
Front view

Side view

Inside view
What do you think?  I did the little sign house for sale/sold sign on the computer ... too cute, huh?  The flower rhinestone thing on the left side, I am not that sure of, but it needed something to balance off the sign.  So, maybe I will think about doing something else here, on the other ones.  We'll see.  Oh, and I used flower soft for the flowers in the window boxes.  So perfect!  Unfortunately, this color combo is the only one I have.  I know the little scrapbook store out here sells it, but I will have to decide if I want to invest in more jars for this one project ...?  Anyway, I wanted to share the house card with you, as I think it came out so cute!  I don't have the recipe details in front of me, but when I get more of them made, I will give you all the recipes at the same time.

See you soon!
Happy Stamping!
Tina

Wednesday, January 23, 2013

For All That You Do!

Hello!  Today I have the second of the two cards I made to give to the nursing home my mom was at.  This one I made for the nurses and aides and this one is a bit more feminine that the one you saw yesterday that was made for the administrator.  In both cards, I wrote a message on the inside.  This card was from an idea I saw on Pinterest.  Check here to see the pin.  Now, let me show you mine ... enjoy!


I loved the colors of papers together so much and thought it came out so nice, I decided to make one more.  One of the ladies from my church, a while back, purchased some cards from me and recently told me she needs some more.  She wants mostly birthday and get well.  So, I changed the sentiment to get well and changed the florals ... and voila ... a new card ... enjoy!


What do you think?  Pretty, huh?  Great simple and interesting card for any occasion!

Recipes:
Paper - Echo Park For the Record 2 6 x 6 pad, Cardstock White, Green
Stamps - Thank You sentiment by (can't remember ...email me if you want to know), Get Well sentiment by Verve Treasured Words
Ink - Versafine Black
Tools  - Spellbinders Classic Scallop Rectangle, Martha Stewart Scallop border punch, Flowers #1by My Favorite Thngs die-namics, #2 by Verve Loopy Blooms dies
Other - Pearls, Grosgrain Ribbon

I will be back tomorrow or the next day with something pretty darn special.  See you then!

Happy Stamping!
Tina

Tuesday, January 22, 2013

So Grateful For You!

Hello!  A few days ago, my hubby suggested I make a couple of thank you cards for the nursing home where my mom lived.  I decided I would like to make one for the administrator and then another for the nurses and aides.  Today's card is the one for the administrator.  So, I didn't want it to be too feminine.  But, still nice.  Let me show you... enjoy!
 

This labels die is from a set from My Favorite Things that has this die and several sentiments, plus it has these borders that are to fit around the edge of the die piece.  See here to see the set.  I am going to have to find a how-to on an MFT blog or something to make the borders work.  I could not get them to line up.  With Spellbinders dies, you can stamp and then line up the die over the stamped image, but that is because they are open.  MFT dies are not.  I will share my how-to when I find out!
Even without the border, I think it came out nice.  What do you think?  It's not too feminine, is it?

Recipe:
Paper - My Minds Eye Indie Chic "Nutmeg", Cardstock White, Turquoise
Stamps - My Favorite Things Framed Greetings set
Ink - Versafine Black
Tools - My Favorite Things Framed Greetings Die, Verve Pennant Trim
Other - Ribbon by May Arts, Pearls by Queen & Co.

See you tomorrow for the next one!
Happy Stamping!
Tina

Monday, January 21, 2013

A Cross for Sympathy!

Hello!  I have a sympathy card to show you that I made for a lady at my church who lost her husband this week.  I knew I wanted to use the Inky Antics set with the cross.  But, you wouldn't believe the amount of time I spent trying to decide what papers to use.  I knew I wanted it to be pastel and pretty.  I finally deided on papers from one of my 6 by 6 pads, and I like the result.  Let me show you ... enjoy!


This sketch is a simple one, but I like it.  I do want to note, that originally, I was thinking I would leave the cross all white, but then at the last minute decided to color the inner part of the cross a yellowy cream color, but leave the outer part open.  I like it.  How about you?

Recipe:
Paper - My Minds Eye Miss Caroline 6 x 6 pad, Cardstock White, Peach
Stamps - Inky Antics Floral Faith
Ink - Memento Black, Copics
Tools - Spellbinders Petite Scallop Oval, Petite Oval
Other - Pearls by Queen & Co.

I will see you tomorrow with another card. 

Happy Stamping!
Tina

Saturday, January 19, 2013

Saturday's Sketch Share!

Hello!  I really thought I would spend more time in my room this week, but that was before I found out what cold weather we were going to have!  Early in the week, it was downright chilly!  I do have a nice heater in my shack but when it is 40 or before, it just takes forever to heat up that metal building.  I did put up with it just long enough to make today's card and that was it!  Later in the week, the weather was better, but I was off doing other stuff.  So, maybe the next few days, I can get some mojo going and make some things to show you.  For now, I have two cards, one from me, and one from Debbie, plus, the sketch we both used.  Enjoy!
 
 
My Card
 
Debbie's Card

The Sketch
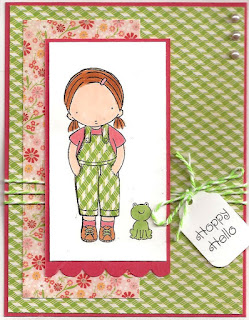
Wow, Debbie sure picked a perfect week to do a winter card!  So, cute!  She wasn't sure about it, but I think it is adorable!  My card, I thought, came out pretty cute too!  I have quite a few Pure Innocence girls that I got late in the year that haven't been inked up yet.  Love this one!  The sketch?  It should definitely get added to the list of go-to sketches.  It is perfect when you have a tall, skinny image.  What do you think?

Stay warm!  See you soon!
Happy Stamping!
Tina

Wednesday, January 16, 2013

Celebrate with Cake!

Hello!  The card I have for you today is one I made for my hubby's son.  I inked up a new stamp that I got at last week's stamp convention.  And I used some paper for a 6 x 6 pad that I haven't used much.  Putting all this together, should have made for one great card ... but, I really didn't like it that much in the end.  But it got sent anyway.  Let me show you and you can be the judge ...


What do you think?  I still don't like it.  But, good or bad, I feel like my blog is a visual art journal, so I have to show you everything I make! 

Recipe:
Paper - Basic Grey Marjolaine 6 x 6 paper pad, Cardstock White, Blue
Stamps - Cake by Endless Creations, Sentiment by Printworks
Ink - Memento Black, Copics
Tools - Spellbinders Classic Circles, Scalloped Oval, Classic Oval
Other - Pearls, Glitter Gelly Roll Pen

Happy Stamping!
Tina


Tuesday, January 15, 2013

Born To Be Wild!

Hello!  I have a really bright and fun card for you today, just what is needed on this cold and dreary day.  I made it for a friend and she loved it!  I hope you do too ... let me show you.  Enjoy!


Doesn't this image just make you smile?  I got this stamp months ago at the scrapbook convention, and was so glad I finally got to inked it up.  My friend and I were discussing that you could change what you put in the little basket in the back ... good idea!  I might just have to try that! 

Recipe:

Paper - Imaginisce (2012 Birthday line... don't know the name), Cardstock White, Lime Green
Stamps - Art Impressions
Ink - Memento  Black, Copics
Other - Ribbon by Creative Impressions, Button by Studio G, Rhinestones, Linen Thread by The Cat's Pajamas

I have another birthday card for you tomorrow.  See you then.
Happy Stamping!
Tina

Saturday, January 12, 2013

Saturday Sketch Share!

Hello!  Are you ready for another share between Debbie and I?  Good, because I have two fun cards to show you.  I will show you my card, Debbie's card, and the sketch we both used.  Enjoy!
 
 
My Card

Debbie's Card

The Sketch
My bunny riding skooter image is not one that you would think about for the beginning of a new year, but that is what I had in mind when I made it.  I was thinking how we should enjoy the ride as we travel through the days of 2013!  I love this fun image and I was glad to get it inky again!   I love Debbie's great little western theme!  The sketch?  A keeper, in my opinion!  What do you think of the cards and the sketch?

Today as you are reading this I am off to Grapevine for the stamp convention.  It's pretty much the same vendors as always but I am mainly going to see "people", as I hope that many of my ex-customers will be there!  Often I am asked if I miss my strore, and I always reply that I miss the people, not the store.  So true! 

I'll be back early next week with some more cards to show you.
Happy Stamping!
Tina
   

Friday, January 11, 2013

January Class Share!

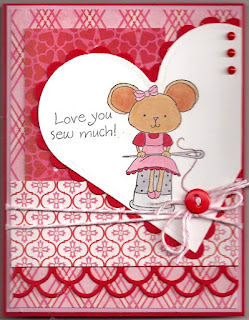
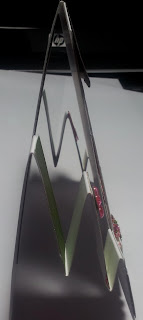
Hello!  I am so pleased that I finished my class card samples for my January class.  I love how they turned out and I know you will enjoy them too!  Most of my blog cards are simple fold-over type cards, but when I share the class cards, that is when you get to see some fancier cards, as I always try to find interesting specialty cards to teach.  This month is no exception, as they will be creating a triple heart easel card, a heart tunnel card, and a swinging z-fold heart card!  Yes, lots of hearts.  It is a Valentine class, for sure!  Let me show you the cards.  Enjoy!
 
Triple Heart Easel Card: Standing Up
 
Triple Heart Easel Card: Flat for Mailing

Heart Tunnel Card: Front
Heart Tunnel Card: Inside


Swinging Z-Fold Heart Card: Front

Swinging Z-Fold Heart Card: Inside

Here are the class details, if you are interested.  Remember, even if you aren't local or can't come, I do class kits which include all the parts, instructions, and colored pictures.  Just call the store (The Crafty Scrapper 972-923-3151) or let me know.

Got Hearts?  - Wed. Jan. 30th, 11:00 a.m. or Sat. Feb. 2nd 2:30 p.m.  $25

Yes, we do! You will create three cards with hearts, and more hearts just in time for Valentine's Day. First, you will make a triple heart easel card, next a heart tunnel card featuring new stamps from Inky Antics, and lastly, a swinging z-fold heart card. Please bring adhesive to include scor-tape, mini glue dots, and some kind of all-over adhesive like a glue stick, detailed scissors, exacto knife, and your preferred coloring medium (colored pencils, copics, etc) (copic colors I used R81, R24, E31, E33, E35, CO, C3). All other supplies provided.

See you tomorrow for the Saturday sketch share!
Happy Stamping!
Tina

Thursday, January 10, 2013

Lordy, Lordy ... Look Who's Forty!

Hello!  I am back today to show you a special card I made for Gary's oldest daughter's birthday.  She turned 40 this week, so I knew I wanted something "over the hill" but not over the top.  Let me show you my card and then I will give you the details ... enjoy!


I saw this idea to make the card look like a cake.  But, it really gave me trouble.  It could have been just one of those days, because I had to wait for the stickles to dry overnight and the next day that I went to work on it some more, everything just seem to work.  What you see in the pic is the front.  The fold-over part of the card is 4 1/4" wide (same as above) by 3 1/2" tall, which is from the top of the black glittered line to the top of the bottom scallop.  I did this because I did not want to scallop the inside white fold-over.  The sentiment of course, is printed on the computer.  Perfect, I think for my not "too over the top, over the hill" card!  I think I like the finished card, even though it was like pulling teeth to get it to all come together.  What do you think?
 

Recipe:

Paper - Basic Grey Out of Print (floral), Bazzill Sonnet (blank print), American Crafts black glitter paper (it is hard to see it in the photo, but this glitter paper is so shiny), Cardstock White, Black (number stems), Yellow shimmer (flames, which I hand cut out ... and not very good, I might add!)

Tools - Spellbinders Petite Scallop Oval, Petite Oval, Verve Very Loopy Blooms die (got this at Christmastime, first time to use it ... love it!), MFT Simply Scallops Medium border die-namics
Other - Black Diamond Stickles glue, Rhinestones, Chipboard Numbers (BasicGrey), Gelly Roll glitter (on flames), Ribbon by May Arts
 
 
I am almost finished with my class card samples.  I should finish later today, so I will be back tomorrow to show you those.  See you then!

Happy Stamping!
Tina

Tuesday, January 8, 2013

Flyin' By with a Birthday Hi!

Hello!  The card I have for you today is one I made for the grandson that lives in Arkansas.  I think it came out pretty cute, so let's get right to it so you can see for yourself.  Enjoy!


I went with an old sketch, but one that I have used so many times.  It is definitely a favorite in my book!  I am not sure you can tell from the pic, but I did cut out just the propeller part and pop it up in the front of the airplane to give some dimension.  Don't you love this card?
 
Recipe:

Paper - BasicGrey 6 x 6 pad called Shine On, Cardstock White, Brown, Aqua
Stamps - Inky Antics Aviator Benton Bear
Ink - Memento Black, Copics, Versafine Black (for words)
Tools - Spellbinders Classic Circles
Other - Rhinestones
 
I will be back in a couple of days with another birthday card to show you.
 
Happy Stamping!
Tina


Saturday, January 5, 2013

Saturday Sketch Share!


Happy New Year!  You will be happy to hear that Debbie and I are continuing our Saturday sketch shares.  I have loved the challenge it has given me and I have found so many new "go to sketches" from doing them.  Today, we both went with New Year cards just for you.  I will show you my card, Debbie's card, and the sketch we both used.  Enjoy! 
 

My Card
 
 
Debbie's Card

The Sketch
I purchased this PI stamp a while back and knew I would make some cute New Year cards with it.  But, it seems with the passing of my mom, and the couple of trips I had to make to Fort Worth, and the step granddaughter being here this week, this will be the only New Year card I will make!  But, you will see this stamp again, as I think it will be perfect for birthday cards too!  Don't you think?  She really didn't fit in the panel, but I made it work anyway.  I love how my card came out!  And Debbie's is great too!  Like the sketch ... might just have to add it to the go-to sketch file.  Do you like this sketch and our cards?

I have made a couple of birthday cards for family and am working on some friend cards too!  And my next order of business after that is getting my next class samples done.  So, I will be back next week with several posts.  See you then!

Happy Stamping!
Tina

 
design by suckmylolly.com